xsigno
Marker recognition
Support > Manual
Marker placement and extraction
To prepare any type of measurement it is necessary to label the images. Points which are used for calibration or measurement purposes must be consistently named in each image. Xsigno provides support for the manual placement of markers but also supports the automatic extraction of markers by using ring-markers.
Markers can be assigned to shape objects, which describe the relation of points to each other. By assigning markers to a grid, it is possible to describe points of some regular repetitive grating, for example the windows of an modern office building.
Manual marker placement
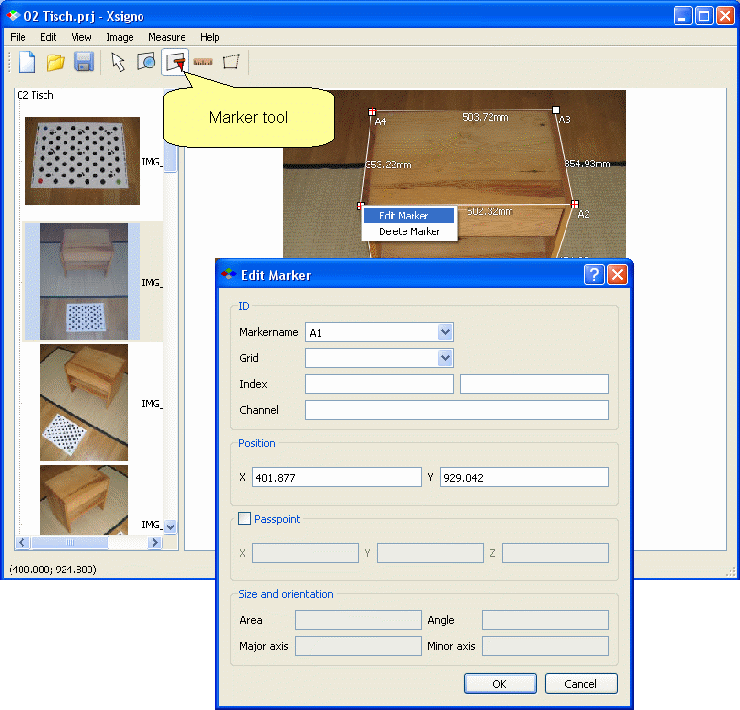
For manual marker placement select the marker tool from the toolbar. By left clicking on the main image you place markers at the mouse location. Using the right mouse button opens up a context menu, select “edit” to view and change the marker settings. The elemental properties of a marker are its name and the position. For labelling periodic structures, it is possible to assign the marker to a grid and identified by a unique index.
If the point is a reference point of known coordinate, it is possible to enter its 3D coordinates into the passpoint field entry.

Marker properties dialog.
Marker segmentation
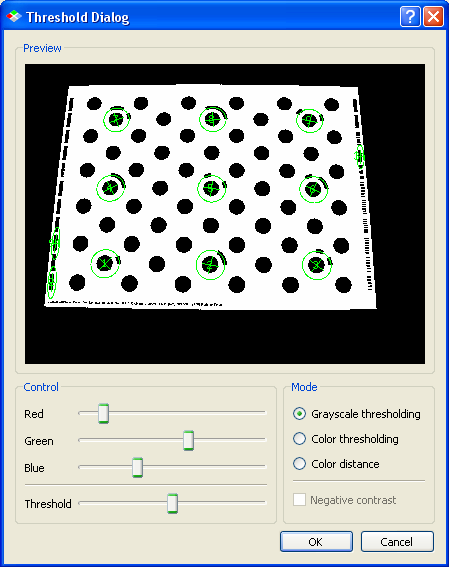
The menu “Image>Segmentation” opens the segmentation dialog. With the sliders you can adjust the global threshold applied to the image and adjust the weight for each color channel. By drawing a rectangle while holding the right mouse button, one can zoom into the thresholded image. Once the region and threshold is selected, pressing OK starts the processing and returns the recognized markers to the main window.
In the current encoding of the marker it is possible to misinterpret some structures in the image as valid marker shape, so eventually you have to clean up and delete these false markers.

In the segmentation dialog the threshold is adjusted to decode the ring-markers.
Sub-Menu: