xsigno
Surface modeling
Support > Manual
Surface modeling
Xsigno provides basic modeling capabilities allowing to document and export planar textured surfaces. The textured model can be published as 3D document using PDF or is exported into the Collada format, an XML based exchange format which is used by Google SketchUp and Sweet Home 3D.
Defining a surface
To construct a textured object, you first need to define a surface. To define a surface, you select a number of points and activate “Edit->Surface”. You need to select at least 3 distinct points to define a valid surface.
Drawing a polygon outline
Activate the polygon tool and place the vertices. Switch to the select tool to close the polygon. Doubleclick or select “Edit Polygon” from the context menu to open the polygon property dialog. The property dialog shows the surface normal, the distance of the surface plane to the origin and the area of the polygon.
File export to PDF or Collada
Use the menu “File->Publish PDF” or “File->Export->Collada” to output your model into PDF or Collada format.

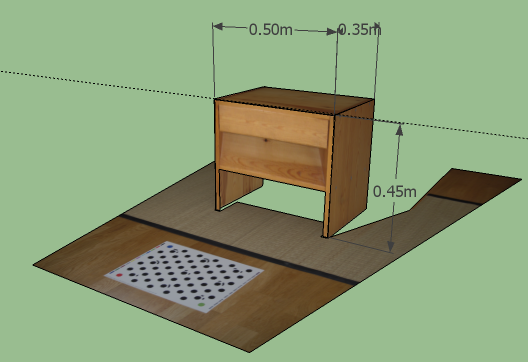
Collada textured CAD model.
Web publishing
The resulting Collada file can be published in the internet with the included Collada Viewer. The collada viewer is a precompiled flash application, which is configured using flash-variables in your HTML file. As flash is a very common plug-in, your friends or customers can look at your 3D models without installing any additional software. The viewer is based on the Away3D engine, which supports a subset of the collada specification.
In the install directory, there is a subdirectory called “flash” which gives an example of how to embed you Collada model into an HTML homepage. The default settings of the viewer are configured via flash variables. The most important setting is the filename to your model. The other settings correspond to the default sliders settings for viewing distance, zoom and rotation angles.
For security reasons, flash does by default not allow to access local file resources. The flash viewer application comes therefore in two flavours. One “release” version, which is compiled for internet deployment and one “debug” version, which is intended for local filesystem usage. Depending on your deployment, specify the “debug/ColladaViewer.swf” or the “release/ColladaViewer.swf” as the application flash file.
The flash rendering engine “Away3D” supports a subset of the collada specification, e.g. it can import only triangular meshes. The included viewer is therefore not suitable as a general purpose viewer. If you process the collada file with a CAD program, the resulting output might not be viewable in Flash.
<script
src="js/swfobject.js"
type="text/javascript"></script>
<script
type="text/javascript">
var flashvars =
{
filename: "tutorial2-model.dae", /* collada
filename */
distance: 3000, /* observer distance to object
*/
zoom: 0.74, /* camera zoom factor */
tilt: 30, /* tilt
angle */
pan: 210, /* pan rotation angle around the object
*/
debug: 0 /* enables the debugging mini window */
};
var
params = {
menu: "false",
scale:
"noScale",
allowFullscreen:
"true",
allowScriptAccess: "always",
bgcolor:
"#FFFFFF"
};
var attributes =
{
id:"ColladaViewer"
};
/* Viewer version for
local filesystem deployment
*/
swfobject.embedSWF("debug/ColladaViewer.swf",
"altContent", "100%", "100%", "10.0.0",
"expressInstall.swf", flashvars, params,
attributes);
</script>
Sub-Menu: