xsigno
Measuring coordinates
Support > Manual
Measuring 3D coordinates and distances
Point Triangulation
Once the camera orientation is setup and the points of interest are marked and labeled in multiple views, you can proceed for the coordinate measurement. To setup the measurement a point has to be marked in two images, then select the menu “Measure>Triangulation”.
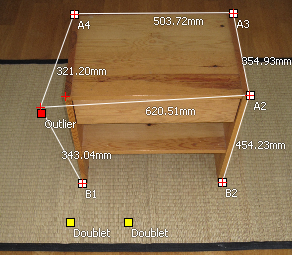
When the triangulation succeeds, the resulting 3D coordinates are projected back into the image perspective and shown as red, cross-shaped markers. The triangulation can fail, for example when the labeling of the input markers is not consistent. If the software detects an inconsistency, the markers will show their error state by changing their color. A yellow colored marker indicates a naming inconsistency, two markers within are labeled with the same name. A red colored marker indicates an outlier, a marker having a too large offset to the triangulated point in space.
There are several methods to access the 3D coordinates of the triangulated points,
by visually drawing a ruler in coordinate mode,
exporting the marker coordinates into a CSV table using “File>Export>Coordinates”,
using copy and paste to copy a marker table into a spreadsheet or text-editor.

Triangulation result and visualization of outliers and doublets.
Measuring distances
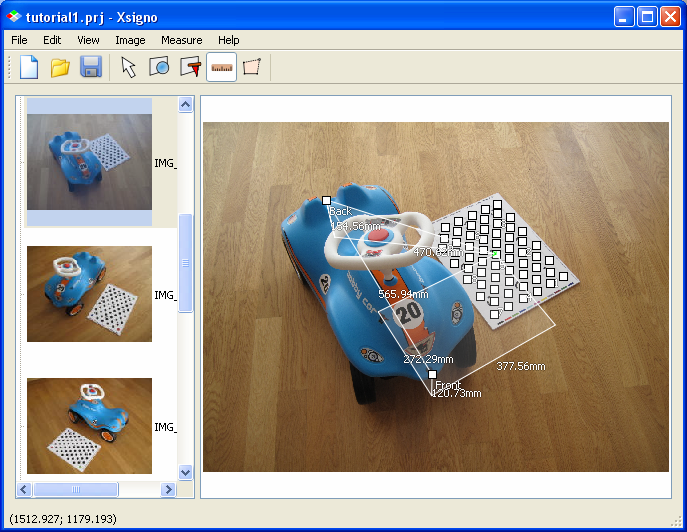
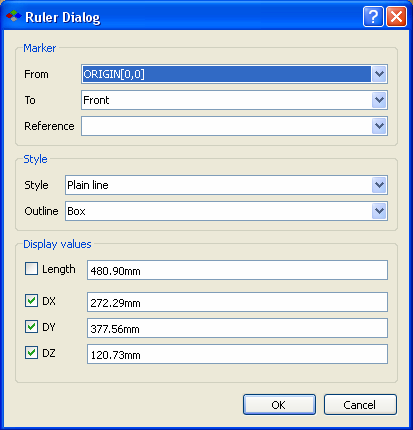
Distances are measured using the ruler tool. Prerequisite for a measurement is that the image orientation is setup and the coordinate measurement done. Activate the ruler tool and then draw a line between two markers. Once the ruler snaps to the second marker the distance is shown in mm. Use the modifier key “SHIFT” and “CONTROL” to switch between measuring the euclidean distance, plumb-line or manhatten distance or open the ruler dialog from the edit entry from the context menu.

Ruler outlines: Straight line, Plumb-line, Box measurement

Ruler Dialog
Sub-Menu: